
Ah… it’s the much awaited post of DIY Sprouts. They’re great for getting in fresh vegetables whenever, wherever – no matter the time, season, or space. And best of all, they’re CHEAP! However, they do need about a week to “sprout,” so patience is a definite virtue with these grow anywhere plant-veggies. So – Sprout on, my friends. Sprout on.
Side Note: Sprouts are best eaten fresh anywhere you might find lettuce or even as a lettuce substitute. If their crunchy nature and weird grassy appeal don’t seem appetizing, then try them sautéed or blend them in a beautiful blueberry shake with spinach (recipe coming soon!).
Substitutions: If you don’t have Moong Beans, try lentils or another type of bean. I’ve been told they all sprout (even grains!). Sprouted brown rice might be my next project…

DIY Sprouts
1/3 cup dried Moong (aka “Mung”) Beans (see note above for substitutions)
Water
Kitchen towel
Clear glass container (I’ve seen posts in which Mason jars are used, but I’ve found that a mixing bowl works best.)
Sunny place

Day ONE directions: Put Moong beans in clear glass container. Cover beans with 2 inches of water. Cover container with kitchen towel, leaving space for the sunlight to filter in through the sides. Allow to sit overnight.

Day TWO directions: Drain water from beans. Rinse beans 4 to 5 times (really well! I like to add water to the beans and swish it with my hands to break up any residue that might have formed overnight). This step is really important in order to avoid a slimy concoction that occurs at the base of the sprouts. Yuck! Moral of the story: Swish to enjoy goodness. Skip to invite slime.
Once swishing is complete, drain water well but leave beans in bowl. Cover container with kitchen towel, leaving space for the sunlight to filter in through the sides. Allow to sit overnight.
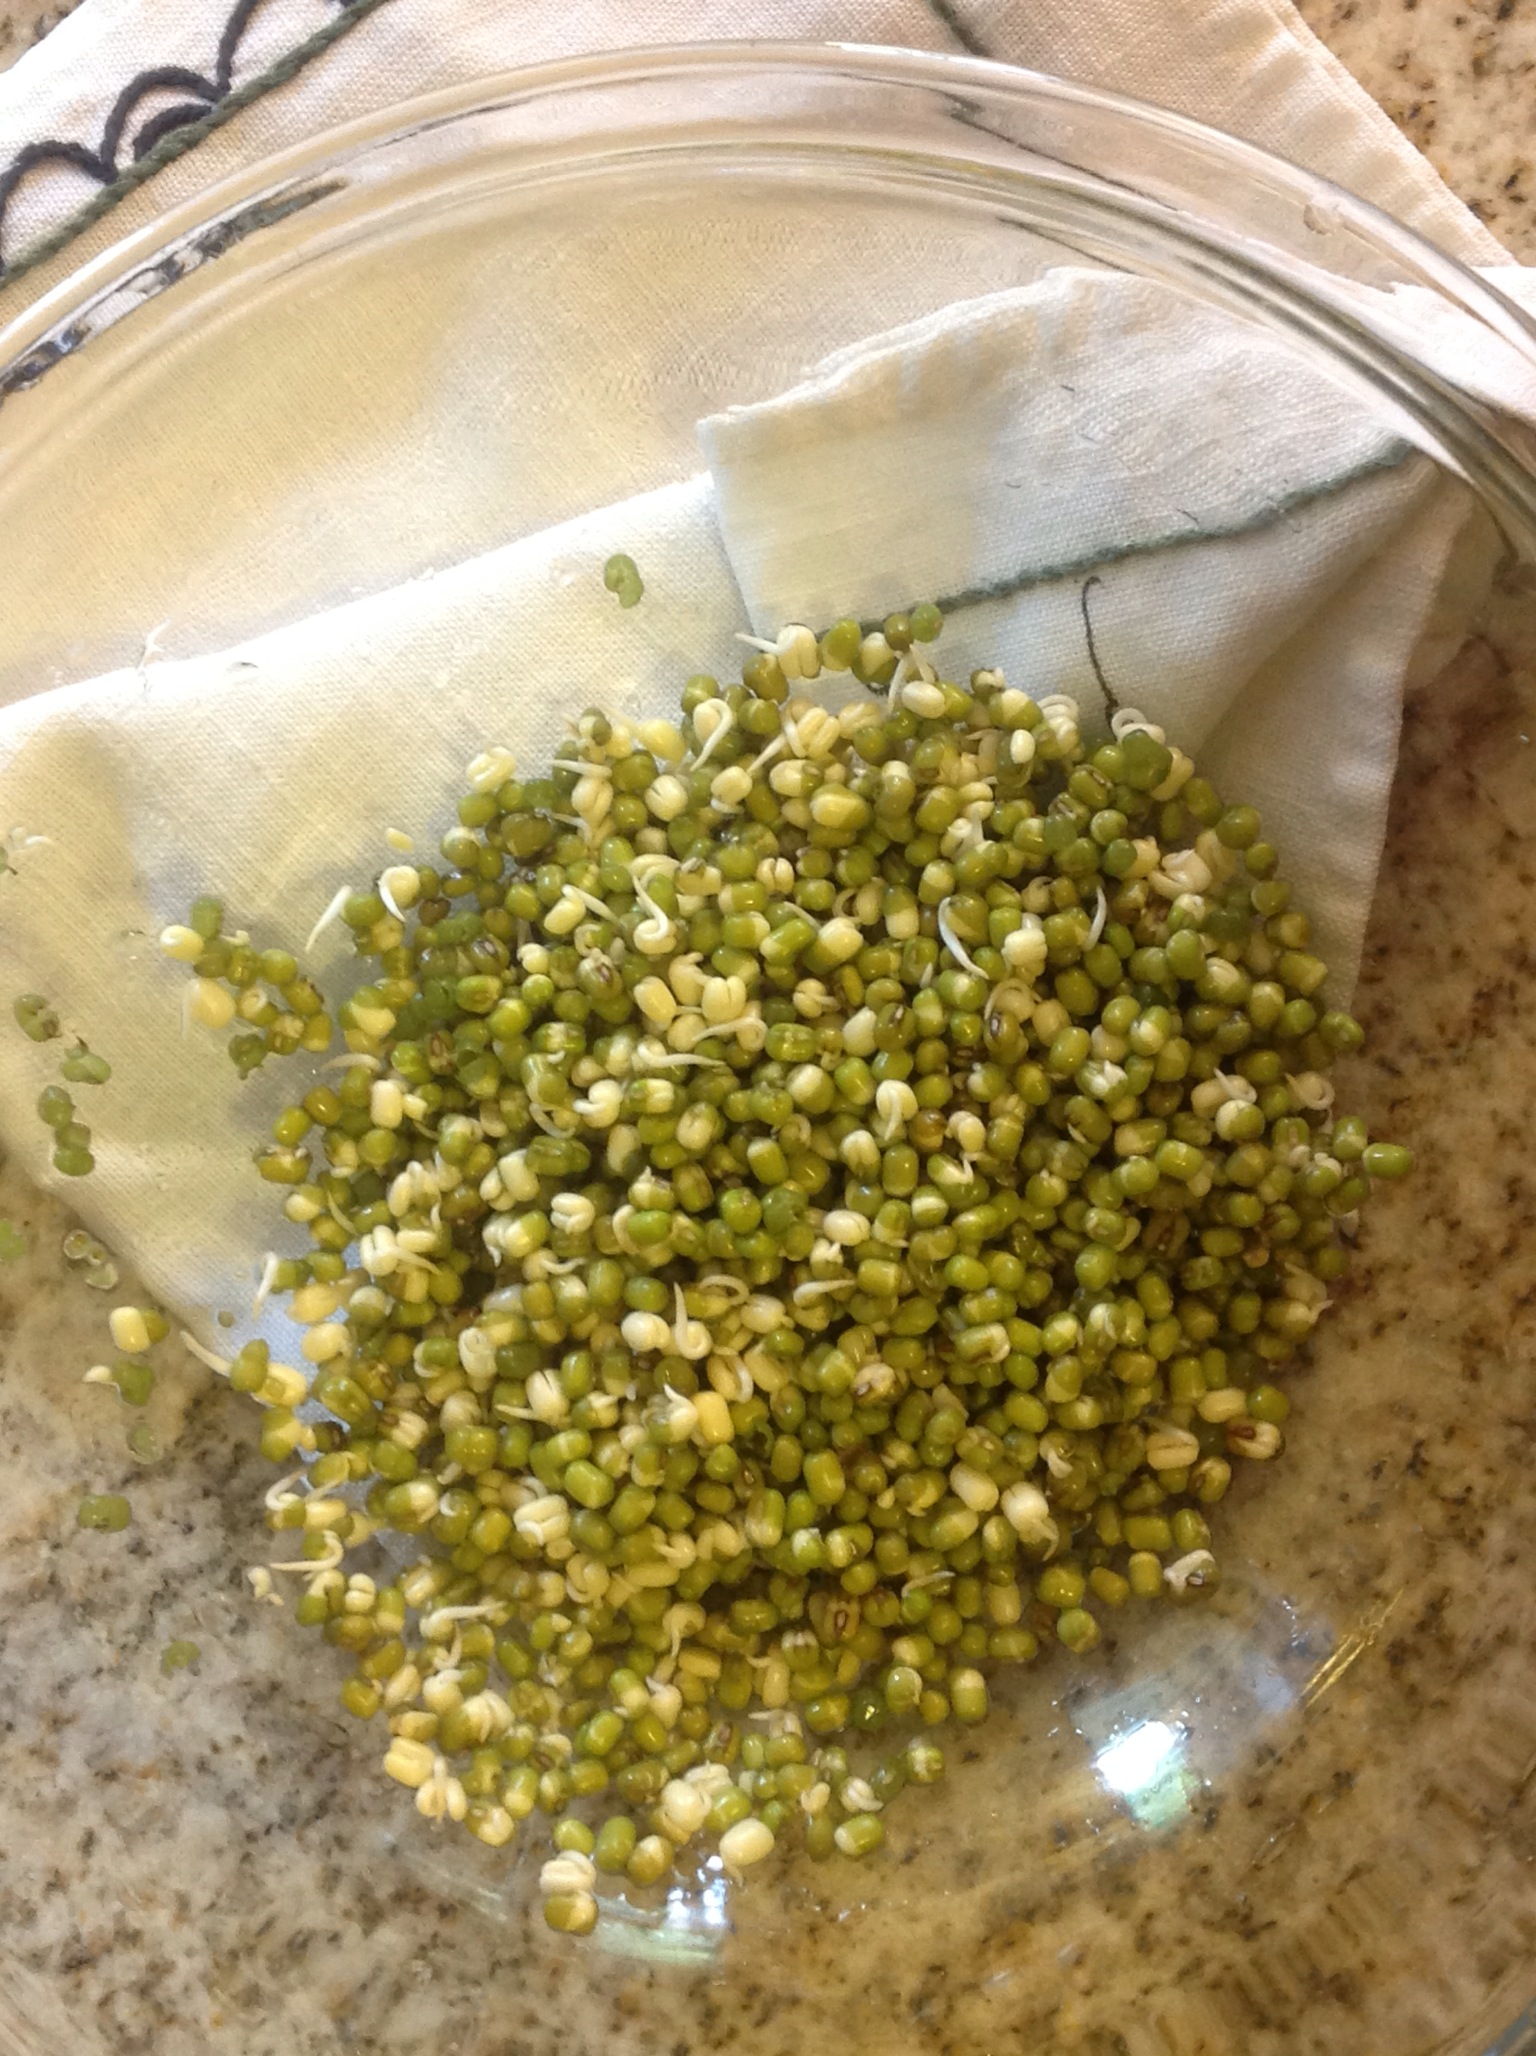
Day THREE directions: Uncover container. Rinse sprouts with water once. Drain well. Cover with kitchen towel, leaving space for the sunlight to filter in through the sides. Allow to sit overnight.

Day FOUR, FIVE, and SIX directions: Uncover container. Rinse sprouts with water once. Drain well. Cover with kitchen towel, leaving space for the sunlight to filter in through the sides. Allow to sit overnight. Note – these “day calculations” are not conclusive. The longest I’ve let them grow is 7 days… because I’m impatient and find too many recipes I want to try them in, however – a simple web search might provide you with a better explanation of how long a Sprout can “sprout.”

1/3 dried Moong beans makes a little over 2 cups Sprouts. My anti-math skills detect that spending $3.62 per 2 pound bag of Moong beans produces 36 cups of sprouts at around $0.30 per 2-cup serving. Ugh, getting a headache….
Good calculations or not: Happy Sprouting! (PS – 90’s era throwback reference here – It’s e.v.e.n. easier than it looks)


[…] ← DIY (Homemade) Sprouts! […]
I never imagined I could make my own sprouts, this sounds very interesting and worth giving a try. I must try it sometime. Thanks for passing by my blog and have a wonderful week!!!
Good to hear! They’re really versatile, too. And, thanks for posting 🙂
[…] Obsessive Nutrition Compulsive about sprouting, sometimes I forget about things I love – like sprouts, beans, cookies, fruit… I got for a few weeks without buying them, and then mental clarity […]
[…] costs down, apart from buying at local farm stands and from bulk grocery bins, is sprouting. My first sprouting experience actually began around the same time that I started this blog, and it involved Moong (or Mung) […]